Thursday, October 28, 2010

Register Renaming

What is the purpose of Register Renaming?

The goal of register renaming is to allow blocks of instructions to be executed out of order.
Take for example the following instructions

1. divd r5, r7, r12
2. addd r6, r7, r8
3. sd r6 0(r1)
4. subd r8, r14, r12
5. muld r6, r15, r8


Looking at these you can see that  without register renaming you have to run the instructions in the sequence 1,2,3,4,5. However if you note, lines 4 and 5 don't depend on 1,2,3. The issue is that if they run before 1,2,3 they will clober the data that 1,2,3 are trying to calculate with.

If we simply rename the registers r8 and r6 in 4,5 we can remove that dependency.

This type of dependency is called a false dependency, because the only thing preventing them from running out of order is simply you are using the same registers, not the same data.

Now look at this:
1. divd r7, r5, r12

2. addd r6, r7, r8
3. sd r6 0(r1)
4. subd S, r14, r12
5. muld T, r15,S

Now the instructions 1,2,3 can occur independent of 4,5. Since there are Read after Writes (RAW), and Write after Reads (WAR) the instructions within the 1,2,3, they must occur in order.
for example, the following orders are now valid.
a. 1,4,2,3,5
b. 4,1,2,3,5
c. 1,2,4,5,3
...
The only requirement now is that 1,2,3 occur in succession, and 4,5 occur in succession for example
the following executions are invalid
a. 2,1,4,5,3
b. 3,1,4,2,5
The reason is because the instructions are data dependent on each other "in" those blocks of code.

Any questions? Just go ahead and ask.

Sunday, September 26, 2010

Threading and Mutexes

So the overall assignment this week was more or less the same as last week, make your main/parent program call a thread to do the fibbonacci work. That was easy, so easy I did it at 3am friday morning when I couldn't sleep, in about 30 minutes, it took a little bit of rework from the fork program I wrote last week, but was simple to implement.

This morning I was thinking about mutex's.  I know that you use a mutex as a semaphore of sorts in that when you've locked it other processes needing to use it (or really use some variable you're about to modify) won't be able to.

So what I did was lock it in the child thread, then when the sibling thread attempts to lock it, it can't, and then forces it to wait until it's unlocked once the child unlocks then the sibling can print the elements of the shared memory.

Remember to include pthreads, you simply have to #include
then to compile it would be gcc -pthread -o filename.o

Good luck!

Here are a few screen shots of the results.
Fibonacci Threaded

Fibonacci with Mutexes

Tuesday, September 21, 2010

Books I would like to read 9/21/2010

Here is a list of the books I would like to sit down and spend some time reading front to back.

Let me know if you have one on your list that I would like.
Pthreads Programming: A POSIX Standard for Better Multiprocessing (O'Reilly Nutshell)
I've poked through this a bit, my buddy Phil lent me the book, and I would really like to get through it, maybe I'll knock a few chapters down this weekend if I don't have too much homework.

C Programming Language (2nd Edition) (K and R C, the definitive guide)
I borrowed this from the library at work, but only got a little into it, unfortunately work and school come first.

Mastering Regular Expressions
I borrowed this one from work, and got through the first 3 or 4 chapters, but then it started getting into the greedy etc matching and I kinda slacked off, I would like to finish this book as what I've learned from it so far has been INVALUABLE.

Linux Device Drivers, 3rd Edition
I have the second edition of this book, and it's a great book, but it only covers up to the Kernel version 2.4, the 3rd edition however covers up to 2.6 so that's great news. There is a free version of the book here: Linux Device Drivers 3rd Edition *Free

I'll give you my next list. If you've read these books give me your opinion, or maybe suggest a better one in place of the ones I've selected.

Saturday, September 18, 2010

Operating Systems -- A shared memory project

Well I decided to start hacking away at my homework for my operating systems class, in the course of about 3 hours, I managed to finish the project and make breakfast....All in all I would say it was a productive morning.

I am not going to share my source code, for reasons I'm debating about writing a post about, to make a long story short, is it ethical to post about your homework? I do think that sharing knowledge in this day and age is what will enable us (humanity) to become smarter as a whole (I think), however there is a line, explaining about shared memory for example and how it works, with examples is valid, literally posting my code up for people to simply copy and paste into their HW not so awesome.

Lets get into it, as part of the assignment we were asked to record our observations and the likes.

First off, the first problem wasn't really all that hard, initially I started to do it recursively, but decided not to, as I was just not thinking right this morning, and writing a simple for loop to do this was WAY easier.

Lets get into the meat of the project, the two main goals were forking and shared memory, the forking was relatively easy, simply creating a variable to hold your pid and then checking whether it's 0 or some other number tells you whether you are the parent or not. Then simply doing something different based on whether you are a parent or not (or if there was a pid error) was all that was required.

Shared memory was a little trickier, and I think I finally get it. Here is the deal, first we create a numerical identifier for the shared memory. Now we can begin to fork, and in the child process we create an attachment to the memory in each child process, THEN in the parent we do the same (This way we KNOW we aren't using the shared variable, it's actually memory, because we're using two different variables and I didn't assign them as pointers).

Now when you're done in the children we just detach from the processes.

In the parent we will detach then deallocate the memory. I was thinking about it, and I decided in my mind that if i deallocate that memory, then still try to point to it with my variable, I should get a segfault, guess what... I did, so that's how my program ends, with a seg fault, but it's on purpose, and I actually know why, and it just plain makes sense. Heres the output of each of the parts of my program.


Part 1
Fibbonacci with only forking
Part 2
Fibbonacci 2 with shared memory

Thursday, September 16, 2010

Kernel Modules

My ECE 437 class was assigned the monumental task of writing a filesystem driver for the linux kernel. I did a LOT of reading and finally started writing a few things, but realized I needed to be able to simply compile a kernel module just to see how to do it so I started following along with the kernel module how to here Kernel Module Tutorial

When I ran into the problem where when I called make, I would see the following error:
make[2]: *** No rule to make target `kernel/bounds.c', needed by `kernel/bounds.

I chased around the interwebs for a bit. I found out that it looks like $(PWD) wasn't returning the present directory, so I updated it to shell pwd per this site: Labjack Forums

Here is my makefile (note that in front of commands are TABS, if you replace them with spaces your makefile won't work, you've been warned)

#!/usr/bin/make -f

obj-m += hello_world.o

KERNELDIR=/lib/modules/$(shell uname -r)/build

all:
make -C $(KERNELDIR) M=$(shell pwd) modules

clean:
make -C $(KERNELDIR) M=$(shell pwd) clean


And finally here is my hello world (keep in mind it's pulled from the above tutorial)


/*  
 *  hello_world.c - The simplest kernel module.
 */
#include /* Needed by all modules */
#include /* Needed for KERN_INFO */

int init_module(void)
{
printk("<1>Hello world 1.\n");

/* 
* A non 0 return means init_module failed; module can't be loaded. 
*/
return 0;
}

void cleanup_module(void)
{
printk(KERN_ALERT "Goodbye world 1.\n");
}


Check it out. and give it a try. hopefully it works for you!

calling make all at the command line should compile it all,

and then a simple sudo insmod hello_world.ko

check out if your module was loaded via lsmod, look for it.

Now check your /var/log/messages file for your alert!

Finally do a sudo rmmod hello_world.ko to remove it from the kernel.

Thank you Caleb for the help various commands and the makefile!

Friday, August 27, 2010

Car, Mp3 Player integration

Anyone reading this that knows me knows I take forever to finish a project, in fact I have many projects that are in the slow (I mean glacier slow) process of being worked on.

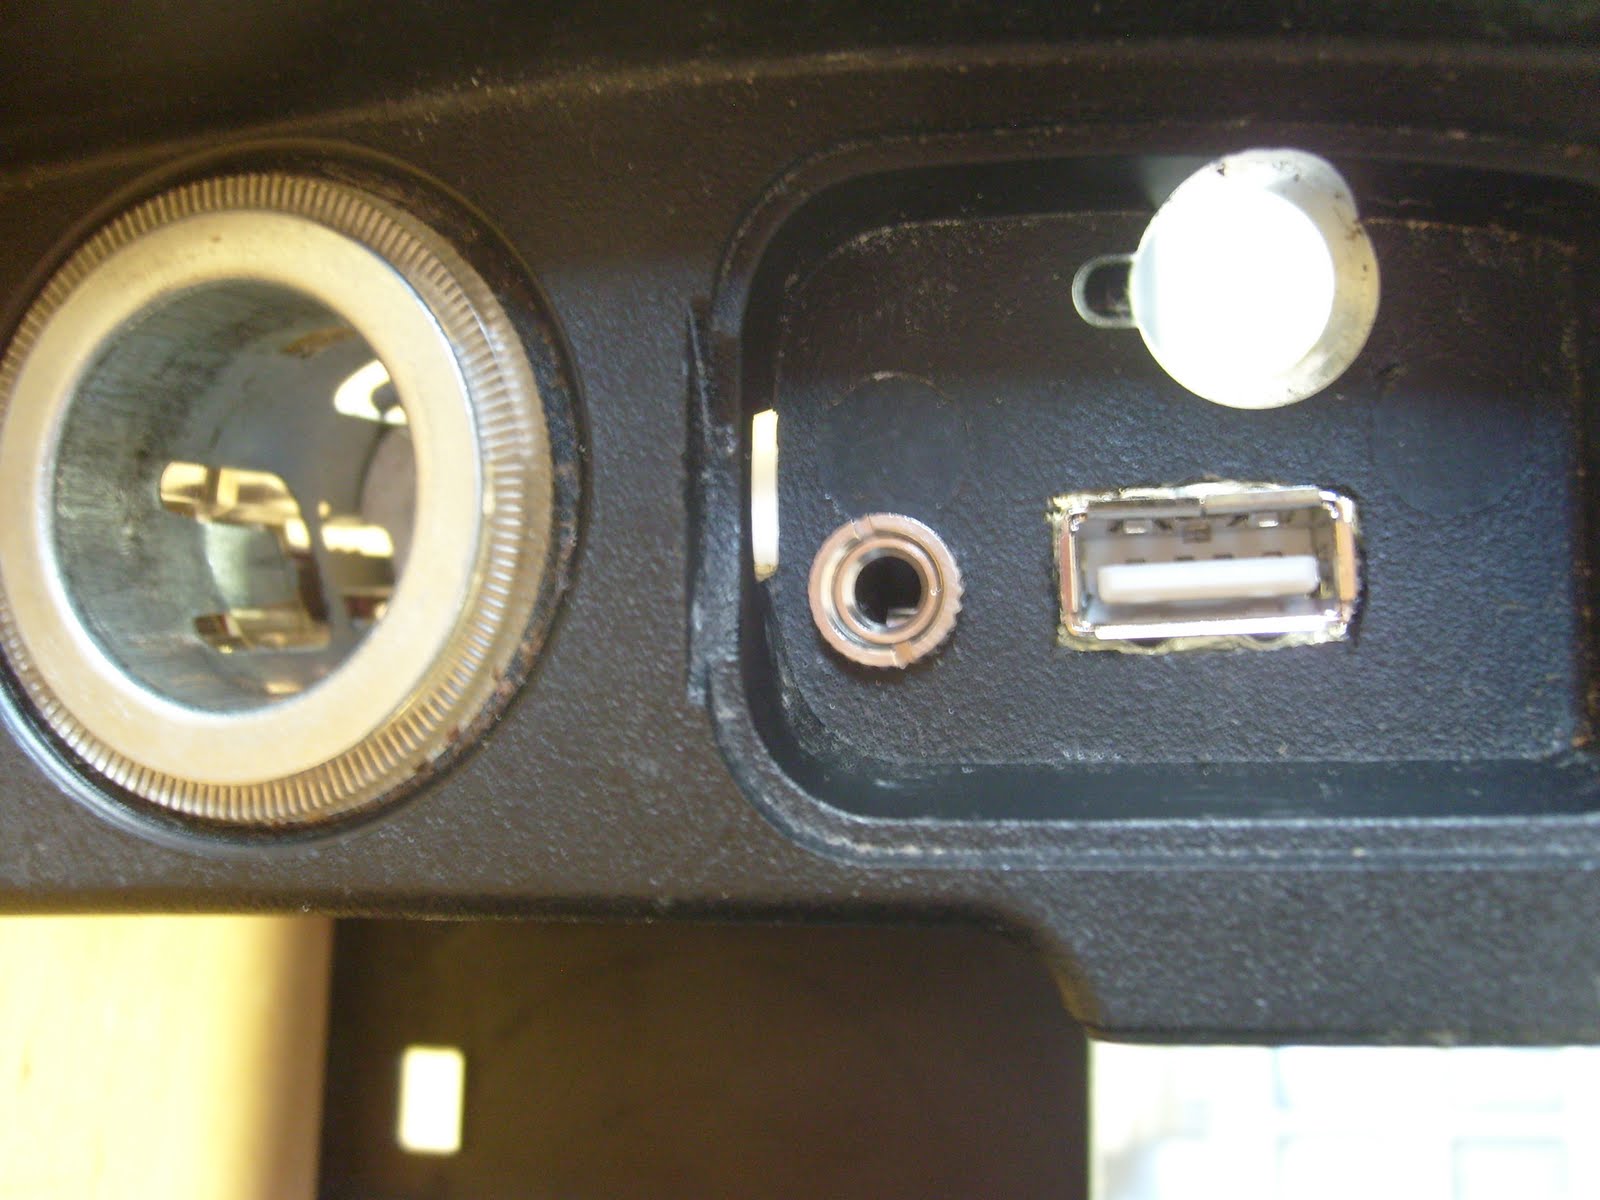
I finally pushed myself to finish my mp3 player integration with my car, I had started this project probably 2 years ago easily. I, for the longest time, had wires hanging out from my console with a plug so I could plug in my iPod, also the ground was being run to my cigarette lighter.It looked TERRIBLE. I finally tore my console apart earlier this summer, and worked feverishly for a few weeks trying to get the USB port mounted, and then working on the audio jack. Summer classes began and I had no vent in the middle of my air outlet in my car so the air just blew anywhere it felt like. This killed my wife (not literally) as she tends to be colder then me pretty much all the time.  I finally kicked myself in the butt and realized that I wasn't going to get the USB working until sometime in the future, so I decided to just finish what I had so at least it looked nice.

I present to you the following:

While finishing up the cables from my cd player, I realized i needed some way to connect the two cables, I could use some kind of plug but while looking at my parts I realized I had RJ45 jacks and all I needed was a straight through network cable and I could connect through. To the left is the jack connected to the plug.

Here is the bottom side of the jack where I had to connect it through.

Here is the inside, I have the usb plug put in. I just need to build a charging circuit, and the actual audio jack.


And here is the whole thing connected up one last time before I put it all back together.


 Here it's in and I'm about to finish putting the faceplates back in.

 and finally I have the whole thing put together and running, it sounds good and looks pretty darn nice.
As a note I want to put here in case I ever have to look into this again, I have whiteblue and blue hooked up to the return, the green and whitegreen are the tape in, the brown is the ground, and when I plug the audio from my iPod in it goes to the blue, when it's unplugged the green/whitegreen combo are connected to the whiteblue/blue through the jack. 

If and when I ever build a tiny power supply and get my USB charging circuit going I'll be sure to let you know.

Friday, August 20, 2010

Rant about Schedules

So I have to rant here about UNM, for just a moment, So far I have had 2 semesters in a row (last spring and this summer) where I have registered for a class, with a TBD teacher. We found out the monday of the first week of class over spring, and found out a week early (I believe) that our summer class had changed times. If all I was doing was going to school, this probably wouldn't be a big deal, but like many others in the Engineering Program we have jobs, and finding out the day of a class that the time has changed (to earlier or later). is a HUGE hassle for people.

I just wish UNM seemed to understand it, I went to CNM for 3 years roughly, and don't recall this happening EVER, and I don't understand how a University can't plan classes that are reoccuring for a DEGREE program on a consistant basis. it just doesn't make sense....sorry for the rant but I had to put it out there.

This is my "theoretical" schedule, but if they change the two classes I have at the end of my tuesday and thursday, and monday wednesday courses I'll be hosed....standby we'll see what happens monday.


UPDATE: Well class has begun, and I'm honestly surprised. The classes times have not changed, I'm a little disappointed that the money being paid for a class to be taught by a instructor is being taught by a PHD student, BUT he seem like a good guy, so hopefully I'll get an opportunity to learn a bit off him.

Thursday, August 19, 2010

My 30 minutes

Ok I spent a little more then 30 minutes working and thinking about projects yesterday, as well as organizing my workspace, so I'll detail a little about what I did.

1. I got my Open Bench Logic Sniffer working, That was a HUGE hurdle, as I really wanted to use it for reading chips on my arcade to see that everything is working as planned.

2. I thought about how I can use my latching hall effect sensors. I wanted to build a gear indicator for my motorcycle, but thought I would need to buy a new set of hall effect sensors because i didn't research the ones I purchased well enough. (There is a lesson here, make sure you research what you're buying, this can save you time and money). For these hall effect sensors I'm going to figure out how much time removal of power will take to reset the sensor, then everytime I see a logic 1, I'll reset the sensor, it's not fancy but I think it'll work.

3. Cleaned up my workspace a little more again, put all my LED's in bins, as well as my resistors, rather then leaving them on the tape reels and baggies.

Also being without internet is rough, I now know I need to download all my datasheets for all my chips, sensors, etc. so when I'm home I can hook things up, not having things like my Quick Reference Guide for programming my PIC16f913 was a real hindrance to progress yesterday, maybe if I have a little time I'll get to play a little more tonight with it.

Tuesday, August 17, 2010

Getting Started

The Hardest Part
What's the hardest part of doing a project in your free time (especially when you're not a motivated person in general)?

Getting Started.

Over at the simple dollar trent makes the statement:
Big goals, big dreams. None of them will happen until I sit down and make the decision to get started with them. I can dream all I want, but until I get started, nothing will happen.
The Key
This is key to what I've said before about getting started, start spending time on what you're passionate about. Trent makes the challenge to go home and spend 2 hours on the big thing you're dreaming most about in your life.  This reminds me a lot about what my dad said about working on our backyard. Looking at it from the perspective of the whole project it looks like it's going to take a lot of work, but if I spend 30 minutes a day on it, you realize it goes a lot quicker then you really ever thought it would. The beauty of it all? It only takes 30 minutes a day. If you can't spare 30 minutes a day about something you really genuinely care and dream about, it really can't be that important to you.

Directing Focus
I like to think of it this way. I used to spend my "relaxation" time just watching tv. But I found myself getting more and more restless. Why? I don't care about watching TV, and unless I am specifically watching TV for a specific show, I just start to get mad at myself. I might complain because I have a bit of a belly, but I don't work out hardly ever. Bam 30 minutes a day, and I bet I could start to fix that. What is 30 minutes? 30 minutes is 2% of your day roughly. Start focusing your time on what you care about and you'll find you have more time. All it takes is a little bit of focused time each day. I truely believe that my "relaxation" time will become the thing I'm passionate about. and the more I

My Project
For my Car project I have some specific things I need to finish, but just getting myself up and doing them can be a challenge. So here is how I'll start finishing things, I'm going to map out what I have left and start making plans to complete each piece.

1. Program my PIC 18F4550 to determine if I can emulate a COM port. If not Use a 16F913, and use true RS232.
2. Using the PIC 18F4550, communicate with my CAN bus chips. (Or 16F913)
3. Find out the CAN messages that my car will produce when I press the song change buttons, as well as various other buttons. (Map out the entire CAN message structure if possible).
4. Hook up my USB port I installed in my car with the right resistances to charge USB devices.
5. Integrate iPod Touch Control with Microcontroller.
6. Use Messages determined in 3 to convert and send to my iPod with knowledge from 5.
7. Determine how to "trick" my tape deck into thinking it's got a tape in it but don't require the motors to be running. (prevents the terrible noise of the motors spinning).
8. Clean everything up and make it look professional. (Possibly cable channels or wraps to make the wires look clean.

School starts in about a week, so finding time is going to become challenging but I know that I can do it.

Wednesday, August 11, 2010

Google Voice Beginner

Well I went home to visit this weekend and my mom still had no idea what she was doing when it came to Google Voice, so I did what any good son should to and made a quick guide. This thing is by no means professional, nor is it even remotely perfect, but it was able to start her in the right direction again, so I am going to post it here for the benefit of others, I'll be updating it again as I get more questions.

Google Voice Beginner Guide V1.0

Thursday, July 22, 2010

Adventures in Prototyping a Board

So I'm working on a reconfigurable programming board for my microcontrollers.  Here is a quick shot of it.


So it's mostly a breadboard in some ways...LOL, but mainly I wanted the ability to have a ICSP connection and I was originally just going to directly connect it underneath to the right pins for the pic 16F913, but decided to just put a header on the other side of the ICSP header and then I can run wire and reconfigure it, as needed. This gives it a little more flexibility, and I don't have to disconnect and try to figure out which wires went where whenever I disconnect the ICSP header from the board.

The benefit to this is now I can program my Pic 16F684, and any other 28 or less pin PIC, I would like to add a power header to the board for additional hookup, but for now this will work I believe, and fortunately I will have the freedom to add to it as needed.

Parts required:
Perf Board from Radio Shack
Headers from Electronics Parts in Albuquerque
IC socket headers from Electronics Parts in Albuquerque
Solder (obviously....hmm wonder if we can come up with a solderless compound....ohhhh I like)

What if you put a lot of conductive material in a superglue form for example, you could "solder" by literally no heat....ok I'm talking crazy. Have a great day.

Friday, July 16, 2010

Setting up my Workspace

I have found that when I have to go to a new computer for work purposes, I have to re-setup a bunch of stuff. I also have scripts that I may have setup that point to drives by letter, maybe not always the best plan, but well I just get used to having things the same way. 

What ways do you achieve having the same desktop stuff setup when you move from computer to computer.

Here are a few of mine:

1. Setting up Shared Drives:

net use /PERSISTENT:yes U: \\drive1\folder
net use /PERSISTENT:yes V: \\drive2\folder
net use /PERSISTENT:yes Y: \\drive3\folder
net use /PERSISTENT:yes Z: \\drive4\folder
2. Registry updates to explorer menu.

3. I make shortcuts and save them on a shared folder on my computer, then just copy them to the desktop if needed.

I have more but they are very specific to where I work so they aren't too applicable to others here. Do you have any other ideas?

Of course these are specific to Windows XP in my case, but heck give me what you have for linux, apple, AND windows.


[Update]
Caleb says.... Remote Desktop..... <- Good call I forgot about that all together, in my case that doesn't really work as well, but for many this is a great solution.

Clearcase: Create A Label with a script

I got tired of looking up how to create a label in the rational documents and rather then going through type explorer, I decided to write up a really quick script. Maybe others will find use in it. Either way if I lose it, it's here for the world to find. It just uses standard commands that are found in the rational cleartool manual.


print "What Vob?";
$vob = <>;
print "What Label?";
$label = <>;
chomp($vob);
chomp($label);
print `cleartool mklbtype -nc $label@\\$vob`;
$asdf = <>;
Now I tried to make it so my context menu would be able to call it, but for some reason I can't make it call my perl script, if anyone has any ideas, please let me know and I'll update.

Wednesday, July 14, 2010

Past and Present 7/14/2010

Well it's been a while, and I better pop back in and say hi. This summer I've been taking Signals and Systems (ECE 314), and am doing an Independent study working on gridlabd with Pacific Northwest National Labs.

I learned a few very important lessons this summer.
1. DON'T PUT SPACES IN YOUR FOLDER NAMES.
2. Focus on one task until completion, jumping from project to project only results in many failed attempts.
[UPDATE]:
3. Test out parts before making them unrecoverable. I made a setup, then used Household GOOP on it to try to seal it, and when I went to use it, it didn't work, and the Goop rendered it useless.

School
I got with a classmate and am looking into working with Cosmiac on my senior project.  I'm not 100% sure what every detail will entail, but looks like a fun challenge, however it sounds like there might be more java involved then I really would like. Of course I'll keep you updated.

Car
Right now I'm trying to finish adding a usb power plug as well as an audio jack to my car, cleaned up finally, and I'm refusing to work on any other projects until it's done. Future plans include reading the CAN bus messages so when I press next on my steering wheel it will change songs on my iPod touch. I do plan on doing a writeup on how I put it all together.

Arcade
I actually finally got a chance to replace my fluorescent light (for the second time), this time I didn't drop the light at walmart before testing it out, now it finally works. Now if only I can finish my other projects and get in here and get it done, I would really like to get an O-Scope, and Logic Analyzer so I can do more testing but anything is possible.

Tuesday, May 18, 2010

Motivation

It's been a while, but then again, it's been a rough semester, I've managed to down 15 credits while working between 44 - 48 hours a week at work, not to mention spending time with my wife. 

So today's topic is motivation, what motivates you? In an attempt to keep each other motivated, one of my buddies and I are going to keep each other accountable. We've decided that for every 72 "failed" attempts at something, we are going to donate $1 per attempt to something we both decide on.

First let me define failed attempt. A failed attempt occurs when we say we're going to try to do something, but either don't even bother to get around to it, or we start but never really finish, I.E. start wiring up the circuit board, but then never finish the circuit.

Obviously we are trying to push past the passive barriers, now there are the occasional active barriers, such as not having parts, or the knowledge to perform a specific task, but we want that to have a minimal impact on such thoughts and ideas.

The way I see it, I have roughly 55-60 years in me left max (who knows I might get lucky and make it longer), and frankly I don't want to waste it. If all I do is watch TV all the time, or sit around and do nothing, what benefit does that give me, I'm simply taking up space, and not accomplishing anything, sure I work, and get stuff done that other people want me to, but I want to accomplish things that I want to.


I'm still learning what keeps me motivated, and how to ramp it up. As I learn what it takes me to do it, I'll stop in and keep updating.

Saturday, February 20, 2010

Pic 16F913 Quick Reference Guide

I wrote a short Quick Reference guide for how I have been programming the Pic 16F913.
Check out the HOW TO here: Programming_The_Pic_16F913_QRG

Good luck and let me know how it goes.

Its should be pretty straight forward.

Wednesday, February 17, 2010

Emulator

Well I finally came up with a good project for my ECE 335 course,

I attempting to write an emulator for the Power PC 403 for the Microprocessors course ECE344, I was wishing the whole semester for the opportunity to have something to test on at home, so when I came into school to test on the actual boards I'd be able to know that my program would work as expected.

In keeping with ECE 335 I'm sure I'll write some "terrible" code without realizing it, at which point, I'll just go ahead and optimize it, this will have to be a really quick deal so initially I'm only going to support the addi command. Once that is up and working I'll reassess what is going to happen next.

The link to the project is here if you're interested in helping let me know.


Thursday, February 11, 2010

Counting

This is the VHDL for the counting algorithm from ECE 528 today.


Monday, February 8, 2010

Finding Bugs

So I was working with a buddy on a program he wrote in Assembly, he had nearly the whole thing complete, and before he's able to actually test it, he did one of the smartest things I can recommend if you can't actually test the code until some future date.

HE ASKED SOMEONE ELSE TO TAKE A SECOND LOOK.

Better then just asking someone else, asking someone else who has a better, even if it's slightly, knowledge of the subject, can see things that you might not see.

Now sure sitting in front of the computer with the board next to you and assembling, loading, running, then going back to debug can gain you some invaluable troubleshooting experience. I won't lie to you, learning how to attack a problem can be invaluable, but one of the biggest key's to do that follows.....

The key for the second person here, is to guide the programmer to the problem spot without giving away the answer if they know it.

Why so? By forcing the person to look at the code EXPECTING a problem they're going to start analyzing each and every line, Is it the right command here, did I set that up right, did I move this pointer to the right spot. EVERY LITTLE DETAIL should get scrutinized by the programmer. And that is good, they'll learn TONS and begin to see the big picture here.

Once you code something up, re-read it, re-read it again, now compare it to your design.

Wait a second I snuck something in there didn't I?

It comes back to design huh. IF every piece of the code you wrote can be traced back to a design element you wrote, you can break the problem, if there is one into a tiny piece, and that's a huge factor when you're working with 1k+ lines of code in assembly.

It might not seem to make sense working with a 50 line piece of code, but if you can force the habit it will make you a better programmer. I promise!

Sunday, February 7, 2010

The PIC 16F913

So I bought some PIC 16F913's I was hoping I could just literally plug in the PIC to the PicKit 1 and just program, turns out it's not that simple, but aside from hooking a couple wires up, well frankly it's not that hard. I just wired up the appropriate VSS, VPP, VDD, and ICSP Clock and Data lines.

One thing that threw me off, is that the microchip site said that the PicKit 1 programs the P16F913, this isn't "entirely true" I was able to use ICSP. Since I can't get MPLAB to program via ICSP, I was able to using the PicKit 1 Classic program, found on microchips website.


Here were my steps:
  1. Hooking up the ICSP. I actually tried to do a "read" with the PicKit 1 Classic S/W, it recognized that it was a 913 AWESOME, this is really good news.
  2. Load up a program into MPLAB and compile, turns out I was able to use the exact same "hello world" code from my 16F684, so I just compiled and was ready for the next step.
  3. I then pointed to the hex file compiled by MPLAB, from within the PicKit 1 Classic program.
  4. I just hooked up the appropriate pins to the LEDs on the board to make sure i was able to turn the LED on and off, if the S/W was working as I expected.
There you have it, it wasn't nearly as hard as I expected it to be, now that I can use the PIC16F913, well frankly I am pumped, the only thing I would really like to do is have a socket plug that I can use to directly wire up a ICSP port, then I can really just use a ICSP plug on any device/board and I "think" I can actually use it.

Next up is maybe serial communications? We'll see the sky's the limit now.