Saturday, February 23, 2013

Twitter the next text messaging app?

I was reading a tweet by @haacked and came to a realization, not sure if he has realized it but using twitter as your text messaging is brilliant.....

Phil Haack (haacked):
If you are with @shiftkey tell him we're waiting for him outside the lobby of the Hyatt by the valet!

Here's why:
Suppose @shiftkey doesn't check his messages often, but his buddies with him do, if they follow haacked they may see that message and relay it to him, its like being able to get someone's attention without having to explicitly text him and friends, one message and you're done. I really like the idea, my only issue with twitter still is privacy, of course I've heard rumors of people tracking others inline presence to determine if they're home or not (for nefarious purposes) aside from that hiccup its a really useful tool for that. Of course if you don't know shiftkey and you most definitely aren't at the hotel this is just noise, which makes me wonder, would location aware tweets make sense? You only see a tweet like that if you're within x miles of said location/person?

Just some thoughts!

Tuesday, February 19, 2013

Speed up Eclipse in Ubuntu

In an effort to keep old hardware running trying to build Android Apps, I was really looking for a way to speed up eclipse. The best improvement I've found is to run using the Sun (Oracle) JDK, it's impressively faster, but for some reason or another you can't just apt-get it anymore.

I found a github site https://github.com/flexiondotorg/oab-java6.git that handles that, however it required a few extra steps, so I just made a quick script for it.

I'm sure there are some parameters that can be added so you don't have to keep adding yes to things, but this was a quick and easy with minimal monitoring, if you make an update (just fork the gist),  then let me know and I'll include it here.

Here is the gist:

Sunday, February 10, 2013

Ripping DVD's in Ubuntu 12.04 -- Handbrake

It took me a little while to figure it out, but these are the steps I use to setup a fresh install of Ubuntu with the necessary software to rip dvd's.

Let me know if you have any additional tips and/or tricks to install that will setup everything!

Roku SSDP nodejs

I tried using the SSDP to find the roku ip address using ncat as recommended by Roku, but using wireshark to moitor it just didn't seem to be working. In Ubuntu using sudo wireshark brings up the app, selecting your network interface under filter type in udp.dstport == 1900 and click apply, I was seeing my router and the roku box notifying the 239.255.255.250 ip of their ip addresses, but I wasn't seeing the "M-SEARCH * HTTP/1.1 showing up. I wanted a nodejs solution so I tried searching for that, hoping that might change things up, I found this:

However placing the roku parameters ST: just wasn't working"roku:ecp", I did notice in the notify from the box that it was using MX as 2, so I tried updating that, however still no luck. After consulting nodejs.org I discovered the optional call back and in their example they close the connection when the call is completed. So I made the update to the following.

It appears that the program was closing the client connection before the message was sent out (and a response occurs), so once I put in the callback to close it, I got a response. Hope that helps anyone else who wants to use SSDP.

 Check out the Roku Remote nodejs module I am working on.

Friday, February 1, 2013

Music Glove Explained

I realize (thanks to a twitter follower) that I never really explained how my music glove actually works.
(Introducing Proof of Concept Music Glove)

Here goes.

The glove connects to the arduino over I/O. (basically just use some I/O pins to read a pressed state).

I wrote some code (referenced by this post: ) to transmit over the arduino's RS232 (Serial) port. The RN-42 uses RS232 to communicate to the device, so as long as the baud rate, etc are the same, then sending data from the Arduino to the RN-42 is a breeze.

Next we need a way to read the data. Download the bluetooth chat application from google (located here: ), modify it where the line says

Next I added some code to read received data.

The receive message section should look something like this:


Changing Volume, songs, etc, are all located in the following function I stuffed in there.

Of course you need a preferences to deal with things but you don't have to, you can simply just say if you see A, then do the action listed for the one you want in the above code.
Put it all together and you have a device which will change the volume or songs (if you set it up via preferences). Remember that some of the options are not publicly declared intents so they work right now, but may change in the future. If you have further questions go ahead and leave a comment, or find me on twitter @onaclov2000.

Thursday, January 31, 2013

Using Nodejs as a fileserver


Creating a Simple Fileserver.
Tip #2
I wanted a simple fileserver, I tried looking for a variety of search terms, but finally came upon simple file server. I came across the post linked by Tip #2 above, but it wasn't exactly clear what it was doing exactly.

The documentation isn't 100% clear so I played with it a little, (and added some comments to one of the posters).

I used connect.

Install it with npm connect.

Next use the following code:

var connect = require('connect'),
    http = require('http');
connect()
    .use(connect.static('pathyouwishtoserve'))
    .use(connect.directory('pathyouwishtoserve'))
    .listen(8080);
.use(connect.static('pathyouwishtoserve')) tells the server where to look for files.
.use(connect.directory('pathyouwishtoserve')) tells the server to return the following directories contents.

If you now navigate to http://your-ip-address:3000 you'll get a list of the directory contents,
if you add a /filename to that path you'll get the file.


I'll be posting tips as I come across them of using NodeJS as an intranet fileserver.
Long story short, I want to build a Roku app that will refer to the NodeJS server for where to find the files. I figure it'll be simpler than PLEX, and also faster (I'm hoping). Once I get the stuff running I'll plan on running it on my Pogo Plug as a media server for my Roku, totally awesome!

Tuesday, January 29, 2013

Creating a Kindle EBook Part 1


I was looking up how to create an ebook, now according to this website: How to Format Childrens Ebook it's a matter of creating a html file and including some image files, then zipping them all up and sending them to your kindle.

It's not quite that simple these days. When you send that zipped file out to your kindle, amazon splits it up and you get each item pushed to your device, so if you have 3 pictures, you have 3 pictures plus your html ebook.

The fix for that is to create a .mobi file, now there are some sites that do that, also the program Calibre works, but for now I decided to try using Amazon's solution. Kindlegen

I use ubuntu so I'll be giving the ubuntu version, if you want an example in the Windows version, then let me know, and I'll try to update for that!

Here goes.

I found this little trick out, create a file called kindlegen located at /usr/local/bin
enter in the following (I had to use sudo):

#!/bin/bash
exec /kindlegen "$@"
afterwords use the following command
:/>sudo chmod -x /usr/local/bin/kindlegen

Now whenever you want to convert an html file, simply call kindlegen . Ok we're done with that part.


Lets make a book.

First lets try the following

Based on the website I mentioned at the top they suggest naming things page_nn.jpg, etc, however as long as you keep track, it doesn't really matter the naming (it's for simplicities sake).

This particular book has 3 pages. Duplicate the following lines for each page, and you're set.

Save your file as test.html (or whatever you want, just substitute your filename below)

Next we'll actually create our Mobi File.

Navigate to the folder via commandline:
:/>kindlegen test.html

The resulting file will be called test.mobi

Next login to your amazon account check your account settings and scroll down to manage your kindle.

Click Manage Devices

Here you can find your email address to send your mobi file.

Next email your .mobi file to that email address.

When you see the file visible on the Personal Documents Section. Check your kindle and see if the file has arrived. If not, you can "resend" it using the Personal Documents Section.

Good luck!

Sunday, January 27, 2013

Using NodeJS as an Intranet Webserver

I'll be posting tips as I come across them of using NodeJS as an intranet webserver.

Long story short, I want to build a Roku app that will refer to the NodeJS server for where to find the files. I figure it'll be simpler than PLEX, and also faster (I'm hoping). Once I get the stuff running I'll plan on running it on my Pogo Plug as a media server for my Roku, totally awesome!

Tip #1
When running a http://nodejs.org/ port, the IP address should be of the machine you are currently on. I chose the port 8080 as it's the standard http port.

From linux you can find this by doing a simple ifconfig command on the command line. From windows ipconfig should do it.

Then using the example below: (from the NodeJS website)

var http = require('http');
http.createServer(function (req, res) {
  res.writeHead(200, {'Content-Type': 'text/plain'});
  res.end('Hello World\n');
}).listen(8080, '100.11.1.6');
console.log('Server running at http://100.11.1.6:8080/');

So when you go to another machine such as your phone and access the page 100.11.1.6 you should get "Hello World". When you're able to do this, your Roku can now see the server (when you have the app setup).

The above tip was discovered after a google search to figure out an error. The link is from stackoverflow, and can be clicked above on the Tip #1 link.

Friday, December 28, 2012

How to quickly build amazon affiliate links on an android device.

Mobile
I was attempting to build an amazon affiliate link on my phone for a pogoplug I bought the other day. I found it to be quite cumbersome. I knew there had to be an easier way!


Social
Additionally the links coming from amazon are long, and don't post well to social networks (read Twitter). I thought there had to be a better way, i searched the android market but just couldn't find anything that easy.

The App
So I wrote an android app to do it.
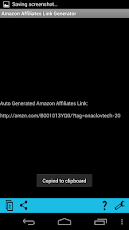
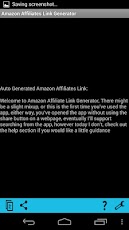
This app makes creating links trivial. I wanted the interface to be as simple as possible. There are only 4 buttons (possibly a 5th someday) from left to right, copy, share, help, settings).

Download Amazon Affiliates Link Generator.

How
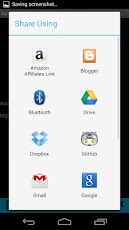
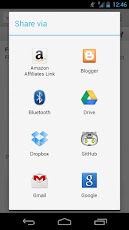
Simply visit the amazon page from your Android, click share, select the Amazon Affiliates Link Generator. It will open up the app and allow you to reshare or copy the link.
Easy as pie!

Ads
This app has no ads.


Check out my other apps as well as Amazon Affiliate Link Generator

Tuesday, November 27, 2012

Syncing Picasa

Anyone here have a Google Picasa account? How about 2? (I'm thinking families here) More?

Sure someone can share an album with you, but if you want to view it, you have to find the link, until google allows shared albums to be visible in your account (and indirectly visible via your Android phone). You'll have to just deal with it.

I got tired of dealing with it, I started working on a project, right now it does a one way "copy" from one account to another, I have plans to finalize the checks that compare the folders (albums) and determine what differences exist, and move photos back and forth to sync them.

My current implementation runs from a python script, and you have to have the Google API's loaded. This is great for those cases where you only need to sync once. However I want to sync say, once a day. Using this locally would require my computer to be running, what if my other family members wanted to sync albums with eachother? Now we have multiple instances.

Eventually I would like to set this up to run on Google's App Engine on a daily or more frequent rate, however oddly enough, their API's are not as clearly available via App engine.

On a positive note, I hadn't really done much programming in Python prior to this project, now I've begun, I don't mind it as bad as I originally had (don't get me started on the whole whitespace thing).

If you're interested in what I'm working on and would like to poke around, follow along, (or maybe help) you're welcome to check out the repository located on GitHub.

I'll keep you updated as I move along with this project.

https://github.com/onaclov2000/PicasaSync


Wednesday, November 14, 2012

Introducing Geek Book Club

If you know me personally you probably have heard of "Geek Book Club", basically we are a group of people interested in learning more technical things. Some work in technical jobs where we don't feel like we're learning enough new techniques to really make us valuable, and some don't work in technical jobs but find it interesting. Either way we're all here to learn.

I recently created a repo on GITHUB, so check it out.

https://github.com/onaclov2000/GeekBookClub

Thank you,
Tyson

Tuesday, October 16, 2012

Unit Testing with Structural Coverage


I don't love spending time testing, so I try to make the best use of my time. I write Unit Tests when I can, and automate any other testing if possible. Sometimes I try to even make writing tests easier on myself by using some techniques I picked up from The Pragmatic Programmer: From Journeyman to Master
Side Note: If you haven't read this book, stop what you're doing, go buy it, rent it from a library, borrow it from a friend I don't care, READ IT, LEARN IT. It's one of the best books I've read about software development hands down, lots of good ideas to improve your craft.

Unit Testing

Unit Testing code is helpful for looking at code you've written in a very controlled environment, you know the inputs and outputs, and being able to duplicate your results should be pretty consistent and easy. Often times this testing puts a single function or procedure through the paces, but depending on what level you are will determine what number of units will be involved.

Primer

After writing some code a few months back, I created what I thought were some good Unit Tests for it. They all passed in the end (and before they did, we found some issues when they weren't passing) which is great. The change got closed and merged into the baseline. I thought I had made a good attempt at ensuring that the software was solid. For the data I used I agree it is solid. Then a bug was found. I hadn't tested every case (even though I thought I had). What would have been a huge help is to have simply combined Structural Coverage with it.

Structural Coverage

Structural coverage is attaching special code to test for running through each path of your code. This is helpful for simply ensuring you've tested each route. This isn't a substitute for proper testing. I'll say it again. A structurally covered program is NOT a bug free program. It's simply a program that has been proven to work as expected for a (pseudo) normal scenario on each path encountered.

Combined Testing

By combining Unit Testing and Structural Coverage, you can prove that the Unit Tests at least are checking each case once. I have since re-ran the unit tests with Structural Coverage, and guess what? I missed a few paths, this didn't explain my particular problem, however it made it easier to see other possible problems I may have in the future. I have since added some unit tests and have made sure that my Unit Testing at the minimum covers each case.No program is bug free, but all we can do is analyze and pick the Unit Tests that we as Engineers believe will cover what's necessary.


If you don't do Unit Testing where you work, I highly recommending starting to do it on your own. From the start make it as easy to setup and run as possible, this will make sure that you will use it, and that your colleagues will use it. Additionally, look for opportunities to make the unit testing automated. If your unit tests run on the system everytime a build is ran, any bugs introduced in those pieces of code can be found quickly. This keeps you from violating the DRY principle, forcing yourself to repeat yourself testing it over and over. OR trying to fix the same thing multiple times because it's not caught at the right time.


Good luck!

Monday, October 8, 2012

Christmas Lights

Description
I finally got fed up. We bought a Christmas light "timer". This thing would do essentially 3 functions, the first was simply turning the outlet on, the second to use a photo sensor and turn off when it's light outside, and the final was a set number of hours (there being anywhere from 1 to 8 hours).  
The Problem
The problem with the hours one is that you have to manually turn it to off, then back to the number of hours you would like. This is frustrating. The photo sensor would seem like a neat idea, however when you don't get good lighting where the photo sensor is, you end up with Christmas lights on all the time. I (and in part due to my wifes request) decided this had to be rectified. 
Attack Number 1
My first run at it was to simply solder onto the point where the timer is on, and try to set and clear the 4 hour timer (but since the system needed to go back to off, then back to on, this failed miserably). 
Attack Number 2
Then I realized that the photo sensor should handle the turning off and on automatically, and I wouldn't need to turn it all the way off. I decided to remove the photo sensor, and put a pair of wires in there and a relay instead. Now the fun part. I have a PIC16F684 that I decided to control this with. With a multimeter I tested putting the photo sensor under the light in my room, when it was under direct light, the resistance went up really high, when I covered it, it seemed to reduce to a low amount of resistance. My guess is that I can put a resistor in line with the relay and whenever there is a high amount of resistance it turns the system off. When the resistance is low it turns the system on. Essentially what I needed was my microcontroller to activate my relay for 4 (or so) hours then turn it off. Then 24 - 4 hours later, it would attempt to turn on the relay again. If I can get this working on a short run, I.E. 10 minutes on, then 2 hours off, then 10 minutes on. I may consider putting in a pseudo random number into there, so the lights are on somewhere between 3 and 7 hours.
Unfortunately I plugged it in, tried shorting the pins for the photosensor (hoping it would activate the lights), well it didn't seem to matter whether the wires were shorted or not, the lights just stayed on.
Final Solution
I finally actually did what any smart engineer* should do. I took a look at what was already there. I saw 2 chips the first was a LM393 a dual voltage comparator. And the second was a programmable timer. JACKPOT. (Here it is for those of you interested: cd4541be). Looking at the datasheet I see there is a master reset line. I tested it out by turning the system on for 1 hour, then when the lights turned off, I simply tapped 3.5 volts to the MR line and bam lights were on again. I now have my "in".

On to the Microcontroller
I decided to use my Pic 16F684, I have a smaller one (can't recall the number at the moment), but I didn't have time to make sure my code ported smoothly as well as verify the timing. I did a couple tests using a couple nested for loops for a wait (I know, I know, I could have used a timer interrupt, and in fact i would like to go fix this, but I didn't have a lot of time to mess around with this and well, hey it was a hack)
So after some timing, I simply put an initial wait in there to get it to hold off to about 7pm from when I plugged it in, and then set the timer to 4 hours. The lights turned on for 4 hours, then a few hours later 7pm hit, and bam we have light.

However over the long term the timing was off for sure, when I got back from vacation it was definately wrong, I'll have to play with it this christmas again!

*Smart engineers keep things simple, and just using a reset line is MUCH simpler then the previous methods I tried.

Monday, September 3, 2012

Syncing ZSNES game saves across ubuntu systems

I was hoping to sync my ZSNES game saves across all my pc's. It turns out it take very little work.

First I made a folder in dropbox for my game saves and made a copy of my current saves out there.

Next I removed the contents of the zsnes folder located at
/home//.zsnes.

Steps:
(Make sure you've saved the files from .zsnes folder below first
cd ~/.zsnes
rm * (this gets rid of the files)
cd ..
rmdir .zsnes

Finally I setup a simlink from my dropbox to the folder so I always had my game saves synced.

Steps:
cd /home/
ln -s ~/Dropbox/zsnes .zsnes

Substitute the path with your path and bam you're done!

Good luck


Saturday, September 1, 2012

Environment Tips

This tip comes from Phil otherwise known as @civissmith on the interwebs.

Often times you have to swap between screens, I usually use alt/tab or some combination of swapping between document/editor in order to read and update. A neat tip Phil alluded to was that if you set your command line to semi transparent, you can still read any commands or notes while typing your code or commands over. This is a great tip as it can save time on having to constantly swap between (possibly losing your train of thought).

Thanks Phil and any other tips you pass along I'll be happy to post!

Wednesday, July 18, 2012

Energia Setup

There is a link in the "issues" section of the github site for energia.

Setup
Extract to a folder on your computer, inside that folder go to hardware/tools/mspgcc-4.6


Swap to super user. (may not be necessary but for sure need to use SUDO).

Then finally run bash ./build-mspgcc
A while later when it's done, you can navigate up a level to the same folder as mspdebug.

Make sure to set the execute bit on this file. This will require use of CHMOD. I just used 777 to be quick, but be careful as this isn't always the best choice of permissions.

Plug your launchpad board to the computer.

Now navigate to the main folder and run (at a minimum sudo) ./energia as super user.

This is the screen you get when you first start.

Ensure your board is communicating:
Select tools->serial port make sure something is there and selected.

Select tools->Board make sure your launchpad is listed and selected.

Select tools -> Programmer mine says AVRISP mkII not 100% if yours should be but these should already be selected automatically.

Test Program A.K.A Hello World
Select file-> examples -> 1. Basics -> Blink


Finally you get the above. Now if you hover over the second button from the left, you see it says Upload.

Click this button your board's led2 should be blinking (this is the led near the bottom of the board, opposite the USB cable, near a button and pair of jumpers).

You should be good to go, have fun and good luck, oh and,

HELLO BACK

Monday, July 9, 2012

IAMHERE 2.0

Well I finally released an update, and IAMHERE has been improved. I added categories of texts, as well as a share button.

There are a few categories and if you have any suggestions let me know and I may add them to my list of updates to include.

If you have any suggestions let me know and I'll definitely look into them.

Thanks and have fun.

https://play.google.com/store/apps/details?id=com.onaclovtech.iamhere

Wednesday, April 25, 2012

Introducing Proof of Concept Music Glove

Well the day I never thought would come has arrived. I have finished a proof of concept of my android music control using an external (in this case glove) device.

It was a long and slow journey, I've often times got so many projects in the pipeline that it's really exciting when I get to see one finish up.

This evening I finished up wiring my device, and asked @civissmith over to help with the video, so Thanks I really appreciate it, trying to do what I was showing with one hand would have been, painful to say the least.

Basic concept, Buttons attached to arduino send characters to android app, when music is running, pressing a button allows control of the music app.

Shot of Glove
Shot of Glove


Button inside glove


Without further words, I think the video will be proof enough.


If you'd like to follow me on twitter I can be found here: @onaclov2000

Monday, April 16, 2012

Causing the next song to play

With the android music player you can change songs using the following broadcast. It's not guaranteed to work with any other music players, or even with any updates they make, however it works for what I need right now (I have no interest in making a music player), If you have a music app and have an intent to change songs,etc, please let me know and I'd be happy to support if possible. I found this across the interwebs somewhere probably nearly a year ago now, I can't remember where I found it, or who wrote it, so if you are the one responsible I would love to give you credit (i'm sure it came from stackoverflow at one point, but after a lot of searching recently I can't seem to find anything about it).
Intent i = new Intent("com.android.music.musicservicecommand"); i.putExtra("command", "next"); sendBroadcast(i);
Good luck.

Modifying Bluetooth Chat

I started out trying to pull the android bluetooth chat application from the developer website....BAD IDEA. I spent quite a bit of time commenting this out, adding a toast here and a if then there. That one is built for a different sdk version than I'm using, so my recommendation would be to pull it from the examples folder in the sdk download.

Well I finally grabbed the bluetooth chat application from the sdk examples folder (when you download from google). After about 5 minutes I tried loading the default app on my phone and touchpad, it worked just fine. I then changed ONE LINE of code and my arduino can talk to my android devices with bluetooth. What line say you? This one:

In the BluetoothChatService.java
From
private static final UUID MY_UUID = UUID.fromString("fa87c0d0-afac-11de-8a39-0800200c9a66");

To
private static final UUID MY_UUID = UUID.fromString("00001101-0000-1000-8000-00805F9B34FB");


That's it that's all it took. Apparently that UUID from what I've been able to gather is for the bluetooth serial interface, so that's all I needed.

Here is video proof of the application in action.


http://youtu.be/Zof0IYUU71Q

Good luck and let me know if you have any questions.